You don’t know what you don’t know
With any new experience you can only anticipate so much. Part of the pleasure of doing something for the first time is figuring out what you will do differently the NEXT time. For me, that is what “learning baskets” are all about. I try something new based on what I already know, but expect I will learn what I didn’t know along the way. Even though I just completed my third locker hook rug, it was a “learning” rug since I was experimenting with making two pieces and then joining them. The product is good – but the process was great. I learned so much, I decided I needed to devote a post to my lessons.
Initial idea
Having completed two small locker hook rugs and loving them, I got the idea of making a long rug by “hooking” together separate pieces. I planned to overlap part of the pieces and hook through two layers of mesh to hold them together. The advantages of this could be that smaller pieces are easier to work with, plus I wouldn’t be limited by the length of the mesh. To work, the mesh on the different pieces would have to fit together perfectly. One of my initial hypothesis was that the mesh was standard enough that I could join pieces even if they were “rotated” 90 degrees. Knowing if this was possible would influence the way I would purchase and cut the mesh.
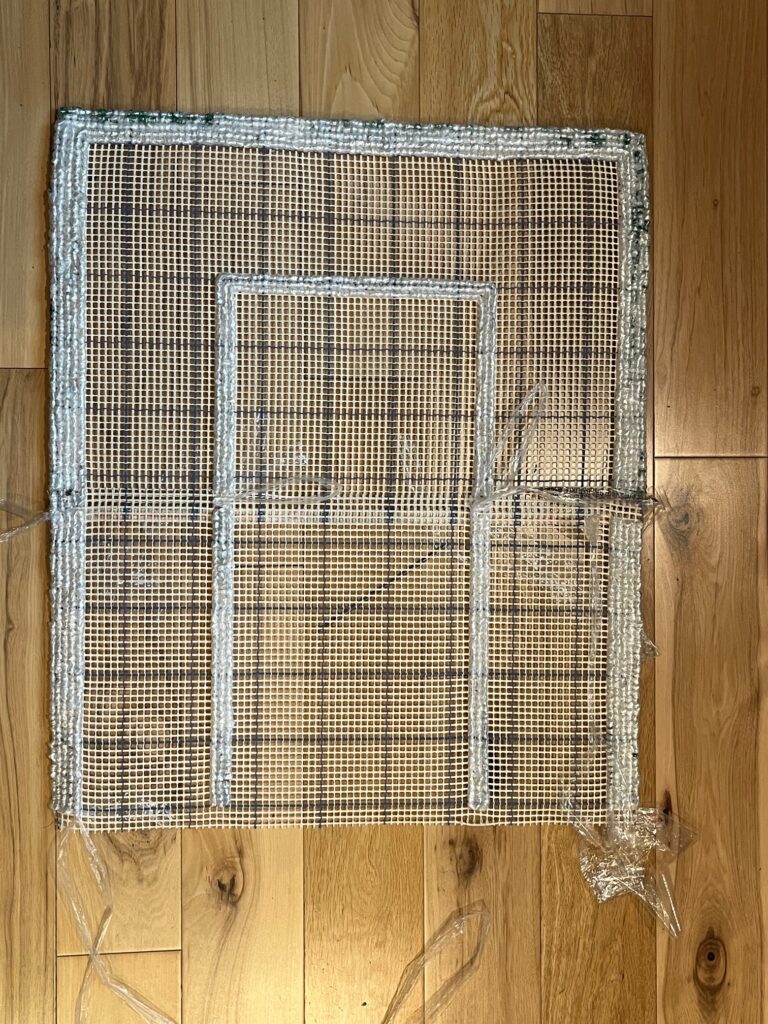
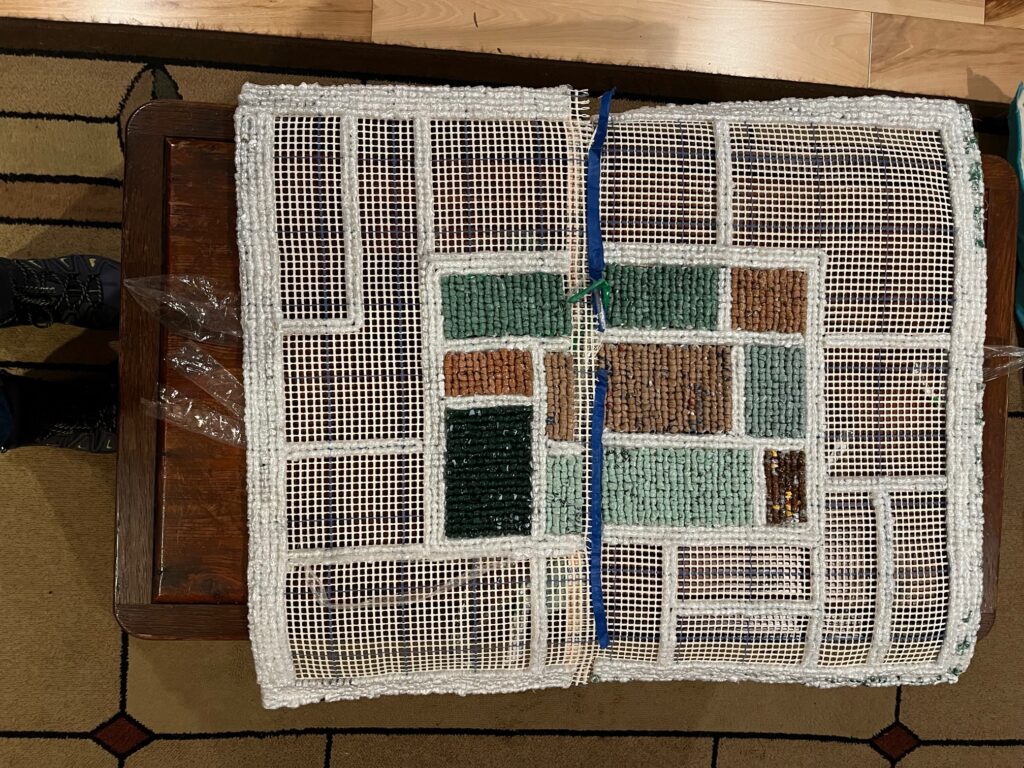
My first idea was that I would join together three small pieces and I would cut them so that the mesh was rotated. This image shows the first two pieces when they were partially connected. The mesh fit – sort of – I had to do some stretching. But when I went to create the third piece, the mesh was off by one full hole. Lesson number one: joining pieces by overlapping was possible, but rotating the mesh was likely to cause many problems.
Changing the scale
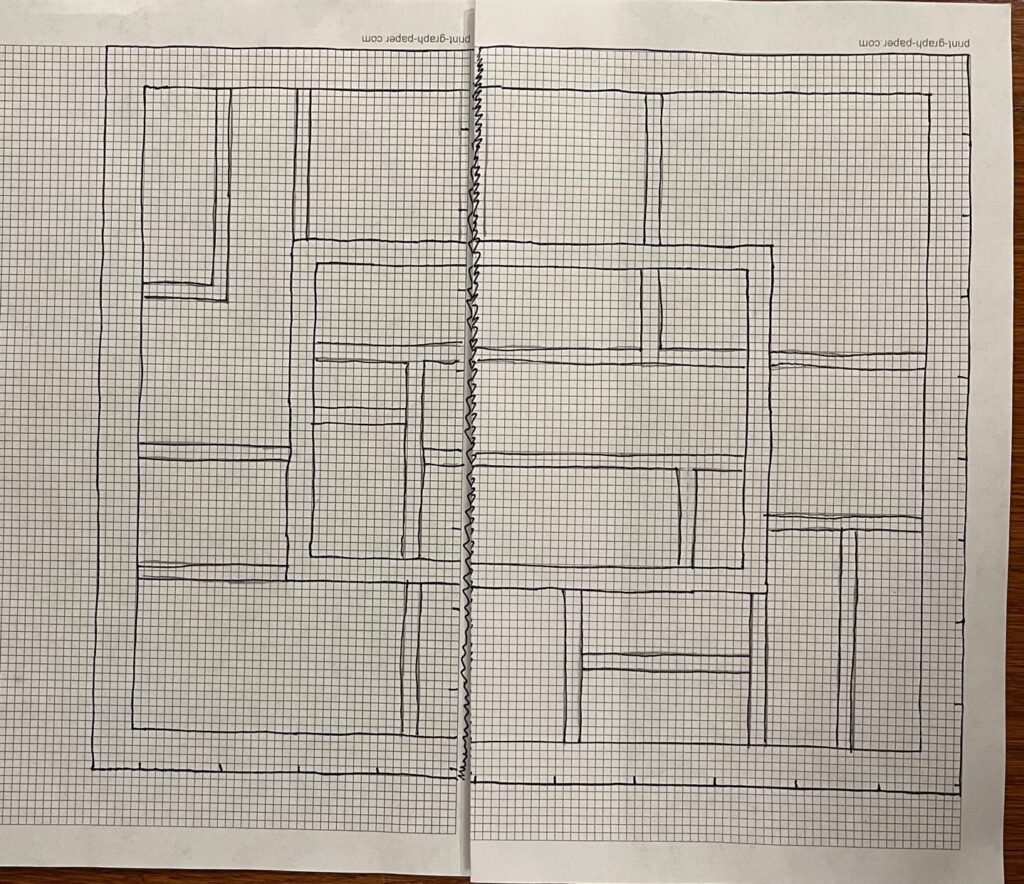
Having already invested some time in this project, I thought I could still make a rug from the the two joined pieces. This required that I undo some of the work, to create a design for two pieces, but that was easy enough to do. I created a paper design using graph paper. This technique was very useful because it was easy to draw in pencil, erase, redraw and see the basic “rough sketch” before working on the mesh. Lesson number two: I should take advantage of the preprinted blue grid whenever possible. Initially I hadn’t paid much attention to the grid and the piece was 91 small squares wide. This was a nuisance. It would have been so much easier if it were 90 squares wide!
The design and colors
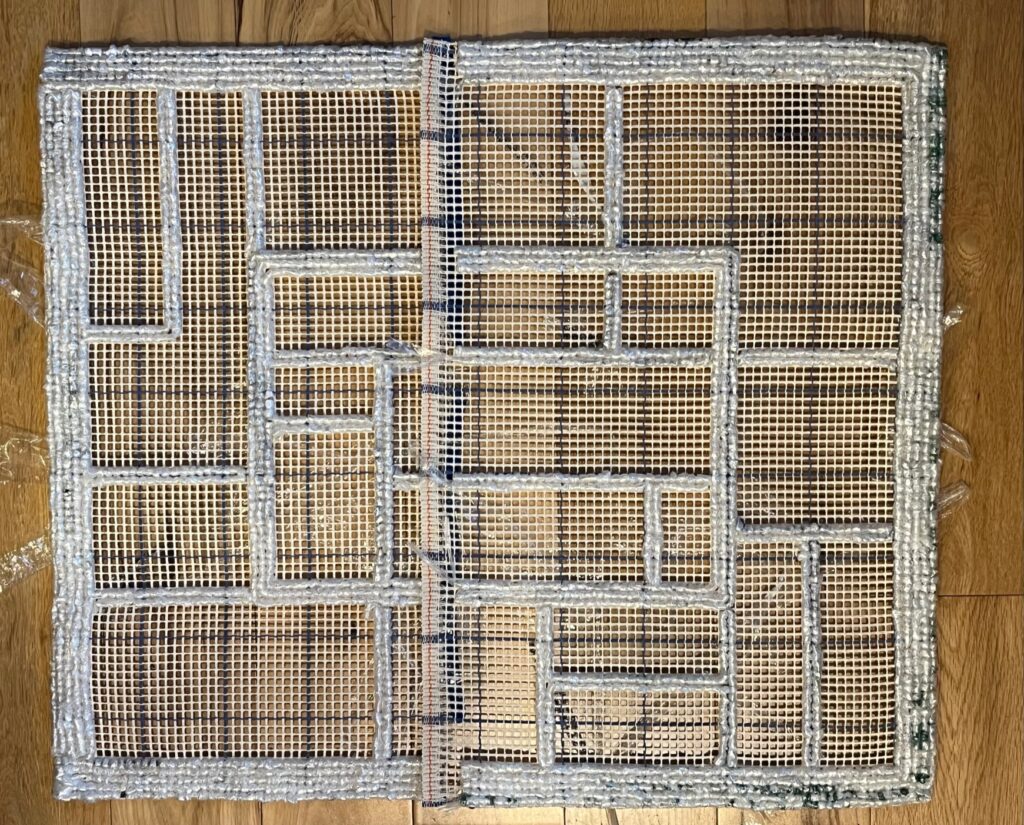
So far all of my locker hook projects have been geometric. I have seen examples of locker hooked work that incorporates organic shapes, but I’m enjoying working with the geometrics, so kept with that basic design concept. I wanted to create an “inner” rectangle surrounded by the “outer” rectangle. Both of these would then be divided into different shapes. I used different line widths to create this idea. The boarder is five holes wide. The inner rectangle is three holes wide. The other lines are two holes wide. Lesson number three: while this worked reasonably well, on a larger scale there should be even more differentiation of the widths. I think the boarder and the inner rectangle should be the same width, probably five holes. The other lines, two holes.
I knew I could help distinguish the inner and outer rectangles through my use of color. The inner rectangle I wanted to do in greens and browns – to represent earth and plants. The outer rectangle would be blues, greys and purples – to represent water and sky.
Some challenges
Fraying edges
The first step of any of my projects has been to finish the edges – which means turning down two rows of mesh and whip stitching it. This “hides” the mesh along the sides and also prevents the mesh from fraying. On the side that I intended to overlap I didn’t think I needed to finish the edge. This proved to be a mistake. The “raw” edge began to fray as I worked on the piece. I intended to overlap three rows, but due to the fraying, I only ended up with two rows. To prevent any further fraying, I put painters tape on the raw edge, which helped a little. Lesson number four: finish all the edges.
Size of the overlap
Working on the overlapped part is cumbersome. However I think I will make it wider next time. There is a slight differentiation in the thickness at the overlap, but it is not too noticeable. Next time I would make it five rows. That width would ensure the stability of the overlap. Lesson number five: make the overlap larger.
Color – how many bags do you need?
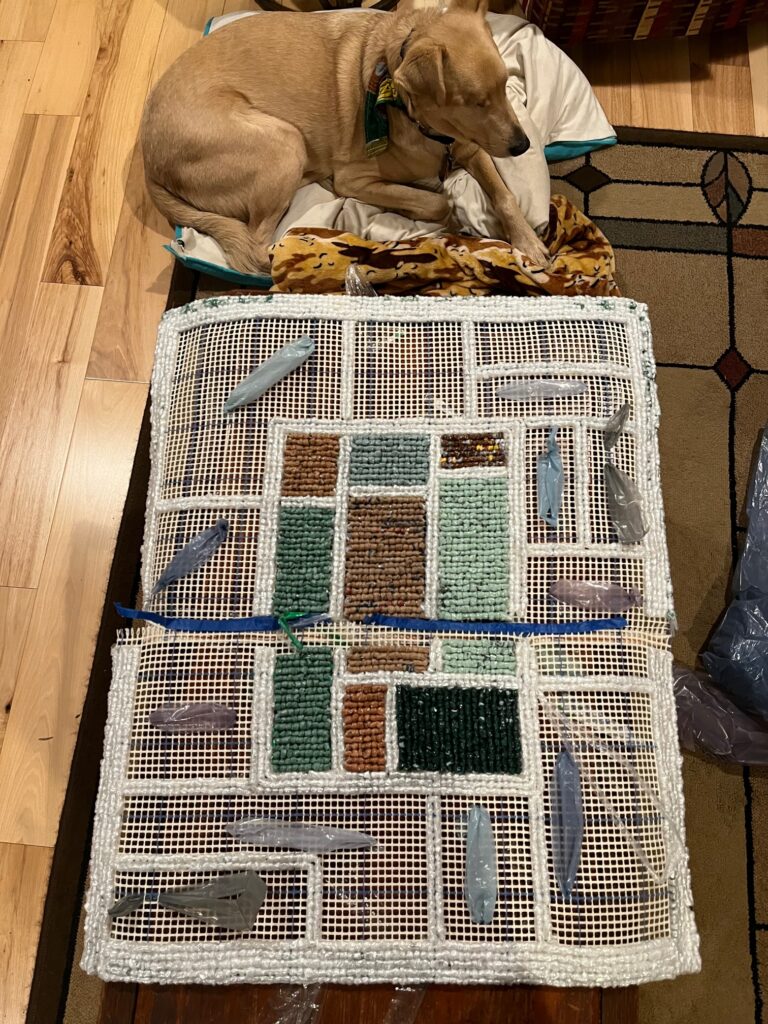
Calculating and planning for the number of bags to fill an area remains a challenge! Try as I might, I could never quite come up with a reliable ratio of bags/area. This is due to the differences in the size of the bags, but I also realized that the texture made a difference too. Some bags are “stickier” than others – and I need more of those for a given area than the smoother bags. And the bags are not uniform in color. If I’m using ones that are “close enough” to the same color, I need to make sure I cut them all up and intersperse the different colors in an area.
Having the whole design laid out helped with color choice. I did some advanced planning and could move things around based on how much of a certain color I had. Lesson number six: I still have a lot to learn.
The devil’s in the details
Joining the two pieces was a little more awkward than I expected. This was largely due to the fraying, which will be less of a problem if I finish all the edges in the future. But also due to pieces slipping around a bit. I found if I stabilized the top piece by using a spare crochet hook to hold it in place, that helped a lot. Also I figured out stitching the sides together with dental floss made the pieces stable. Dental floss is incredibly strong, but not so thick that it created any problems with doing the locker hooking. I learned about the benefits of sewing with dental floss when my daughter danced ballet. She was taught to sew the ribbons onto her pointe shoes with dental floss! Lesson number seven: stabilize the pieces and sew the edges together before trying to hook them together.
Not too shabby
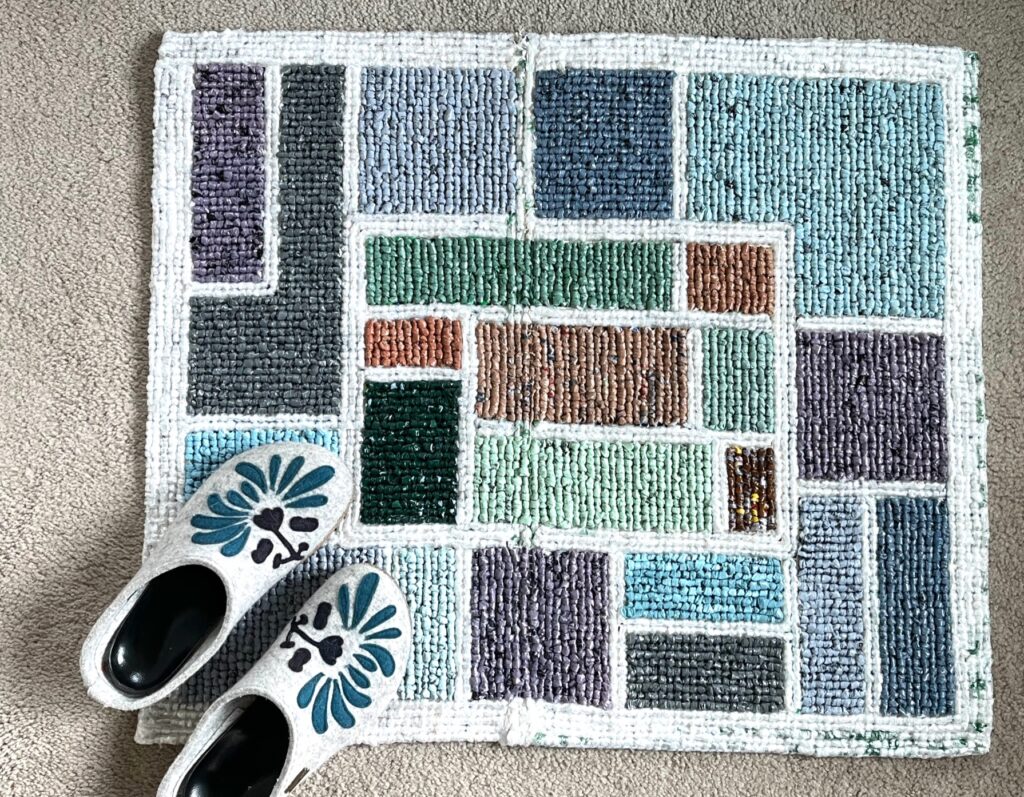
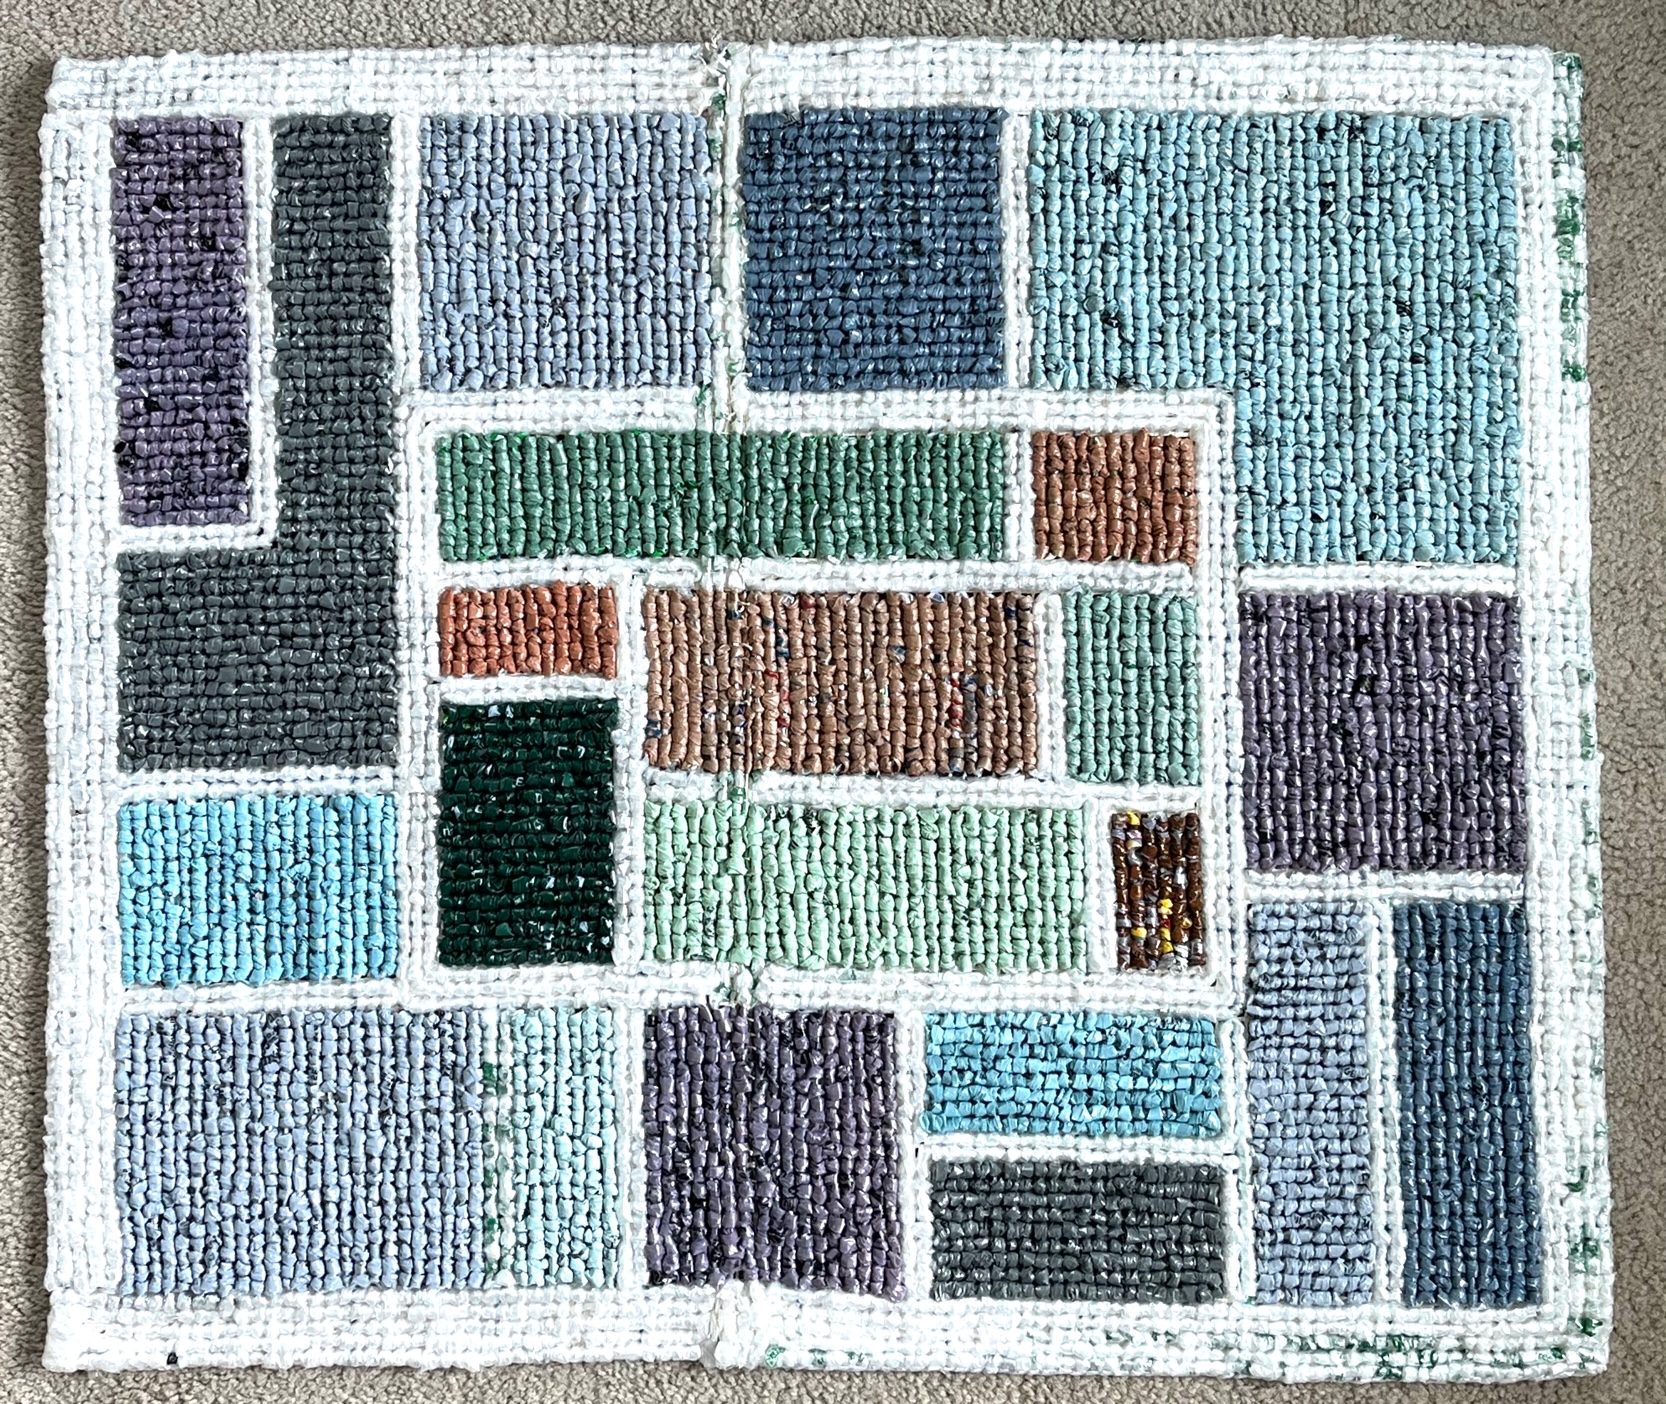
I’m pleased with the outcome. Yes, the seam is a little bit visible. And yes, there are a few rough spots along the sides (where the fraying was the worst). But most people will be viewing it from at least five feet away and most people don’t look too closely at what they are standing on, anyway! I’m satisfied with the variety and distribution of the colors and shapes. And even though the overlap is only two rows, I think it is pretty stable.
I have to order more locker hook mesh before doing another large project. While waiting for it to arrive, I will have time to work on smaller projects and dream big about my next rug. Before I begin a big project, I will be sure to reread this post to make sure I have learned my lessons!
